Category Archives: Recipe

Party Planning: Perfecting Your Drink Menu

Whenever I entertain, my rule of thumb is to have an option for everyone. Luckily when it comes to drinks, a few staples can be very versatile!

Before a party, I want to make sure the bar is stocked. If it’s running dry, the size of the party helps determine my shopping list.

If you’re simply having a pregame or cocktail party, on average you can expect 3-4 drinks per person. When food is involved, typically guests may have a drink or two before the meal (whether a mixed drink or glass of wine), maybe another 1 or 2 while they eat, and after that many you might expect a round or 2 of shots afterwards.

If I’m stocking up from scratch, this is what my shopping list might look like:

  1. One (or two) 750 ml bottle of whiskey
    • Jack Daniels is pretty universal as a mixer
    • Crown Royal or Bulleit work well in cocktails
  2. One 750 ml or 1.5 ml bottle of vodka
    • Absolut or Ketel One typically work (I’m not big on vodka)
  3. One 750 ml bottle of gin
    • (Depending how much you and your friends like gin, a 375 ml bottle might do)
  4. One 375 ml bottle of rum
  5. One 375 ml bottle of tequila
  6. Two bottle of red wine
    • Personally I like to have a Cabernet Sauvignon and a Malbec on hand.
  7. Two bottles of white wine
    • Pinot Grigio and Chardonnay I think are the most universal
  8. A case of good ol’ domestic beer
  9. A six-pack of craft beer or seasonal
  10. *Seasonally/Per Occasion* 2 bottles of champagne or a seasonal liqueur (aka Bailey’s)

That’s a wide selection that basically covers every palate. When it comes to mixers, you can’t go wrong with coke, tonic, ginger ale, and some sort of juice mixer (orange and cranberry are classics)

Root beer works well as a mixer, too. Mango juice (typically a more pureed consistency) works well if you’re making frozen margaritas.

If you want to serve a more special cocktail, below you’ll find some very easy takes on simple classics with a slight, memorable variation:


la vie en rose


Champagne & St. Germain

Flute of champagne or white wine

St. Germain elderflower liqueur

Pour 1.5 oz of St. Germain elderflower liqueur into a flute of champagne or a sparkling white wine (I like Martini & Rossi’s Asti Spumante). The St. Germain adds an extra sweetness with fruity notes like pear and citrus.

The liqueur itself is very sweet, so mix it with a drier wine or a brut champagne/cava if you prefer.

_________________________________________________________________

http://instagram.com/caroline_v_b

Gin & Tonic (Lightly Remixed):

3 oz Gin

La Croix sparkling water (I prefer the lime or lemon flavors)

Lime wedge

In a tall glass filled with ice, pour the gin followed by a can of La Croix sparkling water. For a classic taste, stick with the lime flavor, though the other fruit flavors might offer interesting variations. Squeeze in some lime juice and stir well.

_________________________________________________________________

20131205-193944.jpg

Gin & Grapefruit Juice

1 large grapefruit

1.5 oz Gin

Cut and juice the grapefruit; if you prefer a version without pulp, store-bought grapefruit juice works too. Pour the gin and stir well. Enjoy!

_________________________________________________________________

Guilt-free, Grain-free Cranberry Orange Muffins

If one of your New Years resolutions included the classic “eat healthy,” allow me to say you can have your cake and eat it too. That cake being delectable grain-free, SUGAR-free, paleo-perfect muffins.

You can thank the divine Danielle Walker at Against All Grain for this recipe.

What You’ll Need:

  • 2 eggs
  • 1/4 cup orange juice
  • 2.5 cups blanched almond flour (Danielle doesn’t recommend the brand Bob’s Red Mill because it isn’t as fine as other brands. That happened to be the only brand I had on me, so I used a coffee grinder to make it more fine and it definitely made a difference! Be careful not to overwork the grinder though — you might end up with some almond butter instead, as I did once. Whoops!)
  • 1/2 cup honey
  • 1/2 cup butter* (Danielle’s original recipe calls for palm shortening instead; I used salted butter and opted out of adding the sea salt*)
  • 1 tablespoon coconut flour
  • 2 teaspoons pure vanilla extract
  • 1 teaspoon orange zest
  • 1/4 teaspoon baking soda
  • 1/2 teaspoon nutmeg
  • 1/4 teaspoon sea salt*
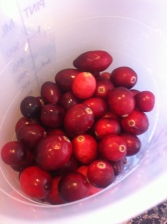
  • 1.5 cups whole fresh cranberries

photo(11)

Directions:

  1. Preheat the oven to 350 degrees.
  2. Danielle gives a genius tip, “Place a heatproof dish filled with 2 cups of water on the very bottom rack in the center of the oven.” This helps the muffins rise additionally and remain moist.
  3. Blend all of the ingredients with the exception of the cranberries in a food processor or mixer. Stir the cranberries in by hand.
  4. Grease or add paper cups to a 12-cup muffin tin. Fill each cup about 2/3 of the way full.
  5. Bake the muffins on the center rack for about 25 minutes, or until a toothpick comes out clean.

photo(9)

These muffins were incredible! Fluffy, sweet, and no different than a “normal” muffin (in the words of my non-grain-free family members). I can definitely attest to that — other “paleo” desserts I’ve tried in the past can have a dry, nutty, or sandy texture, and these absolutely did not! (As the cookbook explains, the finer your almond flour, the better baked goods turn out). This recipe is SO simple and the results are truly irresistible. Confession: our first muffin tin barely lasted 2 days at my house. So tasty!

For those of you exploring a grain-free diet, or even if you’re just looking for a healthier alternative to a classic treat, I will RAVE about this recipe until I turn blue. I’ve tried many other recipes in Danielle Walker’s book and will definitely blog about my favorites soon (with my “experienced” tips.  Certain recipes worked out once and didn’t the second time, so I’ll try to add commentary on what makes each recipe optimally successful.)

I’m so thrilled to have received her cookbook for the holidays – thanks Dad! – and even more excited to share my new-found cooking and baking gusto with you all.

Happy baking (and more importantly, happy eating!)

Wishing you all a happy and healthy start to 2014!

Grain-Free Breakfast Quiche

There are few things more delightful than a warm, savory quiche on a Sunday. But sometimes that delight can be threatened by things such as, say, a grain-free diet.

Have no fear! Today I am going to share my recipe for a grain free broccoli-cheddar quiche. Though some folks my be intimidated by French fare, I have some tricks to make your eggs fluffy, your crust flaky (and did I mention grain free?), and your quiche perfection!

You will need:

For the crust (I’m using Key Ingredient’s Paleo Pie Crust recipe – my favorite!!):

  • 2 cups blanched almond flour
  • 1/4 teaspoon Celtic Sea salt
  • 2 Tablespoons Coconut Oil
  • 1 egg

For the filling:

  • 6 eggs
  • 1 lb. of frozen broccoli
  • 1/4 lb. of cheddar
  • 2 large sweet onions
  • Salt
  • Pepper
  • Nutmeg
  • A hefty dollop of cream

Begin by making the pie crust. I’ve tried a variety of paleo pie crust recipes from Pinterest, but this one is hands down THE BEST! Many recipes call for coconut flour, which in my opinion results in dry, overly sweet crusts (that are almost chalky in your mouth). Using almond flour really gives the crust a “non-Paleo” taste and consistency. It works well for both sweet and savory dishes — stay tuned for my apple pie recipe!

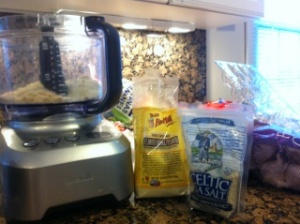
  1. Pulse the dry ingredients in a mixer briefly. Slowly incorporate the eggs and coconut oil, pulsing until the mixture forms a ball. Press the dough into a 9″ pie dish and bake it for 8-12 minutes at 350 degrees.                         IMG_4160
  2. Be sure to thaw your broccoli before using it in your quiche – you don’t want the excess water to interfere with the consistency! Once your broccoli florets are thawed, chop them into small pieces.
  3. Finely chop two large onions and let them saute over some butter or olive oil, until they turn a golden color. Once they are caramelized, incorporate the chopped broccoli. IMG_4157
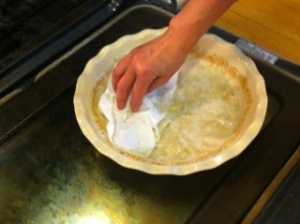
  4. Warning: when you remove your pie crust, you may find that it has a layer of coconut oil on it. Easy fix: dab it off with paper towel! (That’s easy enough, right? Probably not a Le Cordon Bleu approved method, but it works). Letting the oil soak may make the crust too soggy. Let it cool aside as you finish preparing the filling.                                        IMG_4167
  5.  Grate your cheddar. Be as generous with the amount of cheese in this recipe as you’d like! Feel free to vary the kind of cheese you use. I paired the broccoli with an aged cheddar, though a quiche lorraine (with bacon! yum) typically features Gruyère. IMG_4164
  6. An excellent quiche has fluffy eggs, which I’m guessing in the French culinary tradition comes from a masterful whisk. In my kitchen, it comes from a Magic Bullet. Crack 6 eggs into a mixer/Magic Bullet along with the cream, salt, pepper, and a dash of fresh nutmeg.  Give them a spin until they are light and bubbly. IMG_4176
  7. Once the egg and cream mixture is ready, pour it over the broccoli and onions with the cheddar and mix well. IMG_4180
  8. Fill the pie crust with the filling and feel free to add an extra layer of cheese.                            IMG_4188
  9. Bake at 350 degrees for about 30-35 minutes (or until it becomes slightly golden and the edges begin to brown). I experimented with both an almond flour crust (the larger pie shown, for which this recipe is measured) and a coconut flour crust. I definitely preferred the almond flour crust! IMG_4192
  10. Remove from the oven and enjoy! Happy eating! IMG_4197

The Perfect Seared Steak

THE PERFECT SEARED STEAK

What you’ll need:

  • Your preferred cut of steak (I tend to prefer a filet or sirloin steak)
  • Olive oil
  • Salt
  • Black pepper corns
  • Salted butter (Irish butter if you can!)
  • Garlic*
  • Chives, Cilantro, or herbs of your choice*

*Optional

There is no fancy technique or secret to a mouthwatering steak. Just simplicity and confidence. I’ve included the recipe to an herb butter I tried the last time as a variation, though in my opinion, a skillfully made steak shouldn’t require herbs or additional flavors to be delicious.

  1. Marinate the steak in olive oil for about 20 minutes. A frozen or non-room-temperature steak should never hit the pan!
  2. *Optional: As the steak marinates, finely chop garlic and combine with chives, cilantro, or other herbs with room temperature salted butter.
  3. Heat a non-stick pan until hot to the touch. The steak should sizzle the moment it hits the pan.
  4. Sprinkle salt (and/or steak seasoning) to both sides of the steak.
  5. Place the steak on the pan and let sear for about 2-3 minutes per side for a rare steak, 4-6 minutes per side for a medium steak, and 7-10 minutes per side for a well-done steak (though I personally think the best steaks are medium-rare). These times are approximate based off my own stove and best suited for a steak about 1″-1.5″ thick; vary the time per side based on the temperature habits of your stove. BE SURE TO ONLY FLIP THE STEAK ONCE!
  6. After you remove the steak from the pan, place it on a plate and put a (generous) bit of butter on top, then covering it with foil. *Here you can use your herb butter! As the butter soaks in and the steak settles (always allow your steak at least 5 minutes to settle after removing from the pan), crack black peppercorns with the wide face of a large knife, and sprinkle on top of the ready steak as desired.

This recipe is very straightforward, but does have some essential laws that, if broken, really jeopardize the flavor and texture of the steak. Go forth with gusto and enjoy your steak!